
The kitchen is the most heavily used room in the home, and the tiles you choose will be looked at, walked on, and cleaned more than in almost any other space. That means tile selection here carries more practical weight than anywhere else. Get it right and your kitchen looks polished, feels considered, and holds up beautifully over years of daily cooking life. Get it wrong and you’ll be looking at an awkward choice every single day.
Kitchens also present a unique tiling challenge: there are two completely different surfaces to think about, the floor and the splashback, each with different practical demands, different visual roles, and different rules for getting the most out of them. This guide takes you through both, step by step.
Step 01
Start with your kitchen style
Before thinking about specific tiles, identify the aesthetic your kitchen is working towards. Tiles need to support and complement the overall design direction rather than fight against it. Here are the four most common kitchen styles and what tends to work best for each:
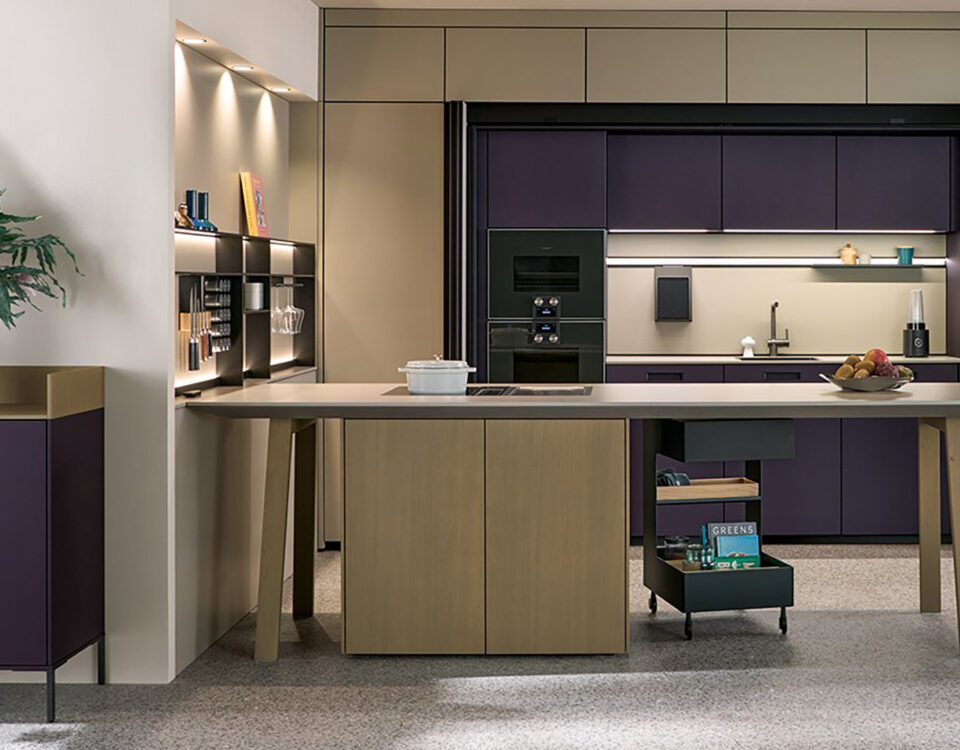
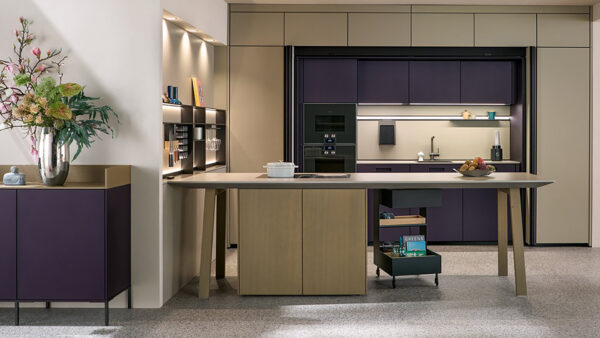
Modern / handleless
Clean lines, minimal visual noise, and a cohesive material palette. Large format porcelain on the floor in a stone, concrete, or warm neutral effect. A full-height splashback in a matching or tonal material, ideally in a large slab format with minimal grout lines.
Best tile: 600x1200mm stone-effect or concrete porcelain, matte finishShaker / classic
Timeless, warm, and characterful. Metro tiles on the splashback in a soft glaze, or a stone-effect floor tile in limestone or travertine tones. Pattern tiles work beautifully here as a splashback accent, particularly encaustic or heritage-style designs.
Best tile: Glazed wall tiles, limestone-effect floor porcelainOpen-plan / living kitchen
The floor needs to work across a larger area and flow into the dining or living zone. A large format tile in a warm stone or wood effect creates cohesion. Keep the splashback relatively simple so it does not compete with the room’s other focal points.
Best tile: 600x1200mm or larger, warm stone or wood-effect plankBold / statement
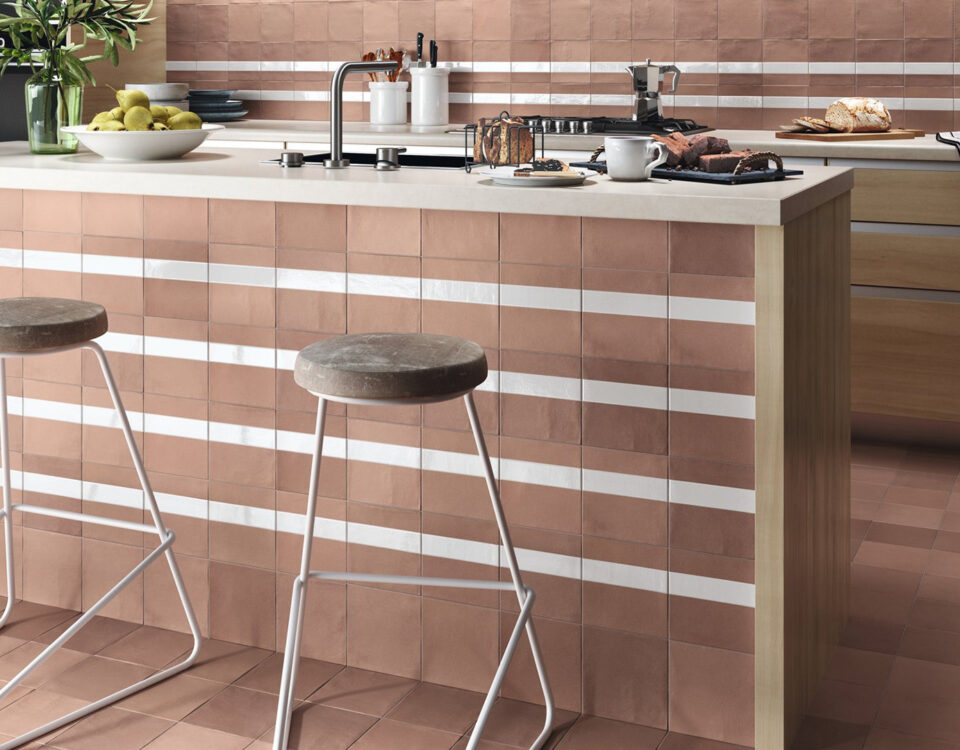
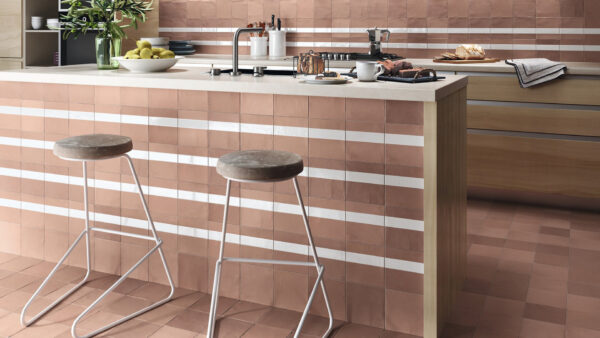
Confident colour or pattern on the splashback, kept calm elsewhere. A terracotta floor tile or a richly coloured glazed splashback can define the whole character of the kitchen. Pair with plain, muted cabinetry so the tile does the talking.
Best tile: Coloured glaze, zellige, encaustic, or terrazzo-effectStep 02
Choose your kitchen floor tile
The kitchen floor is subject to more punishment than almost any other tiled surface in the home: dropped pans, spilt liquids, heavy foot traffic, grease, and the daily drag of chairs. Your floor tile needs to stand up to all of that while still looking good. Here is what to focus on:
Material: porcelain is the clear choice
Porcelain is the most practical flooring material for kitchens. It is highly dense, virtually impervious to water, extremely scratch-resistant, and needs no sealing or special maintenance beyond regular mopping. It also works beautifully with underfloor heating. Ceramic is a viable option for lower-traffic kitchens but is softer and more absorbent. Natural stone (limestone, travertine, slate) brings unmatched character and warmth but requires sealing and more careful maintenance in a kitchen environment.
Format: go larger than you think
Large format tiles (600x600mm and above) are the dominant choice for kitchen floors right now, and for good reason: fewer grout lines means fewer places for grease and food debris to accumulate, and the broader, uninterrupted surface makes even a compact kitchen feel more spacious. In an open-plan kitchen-diner, a 600x1200mm or larger tile running continuously from kitchen to dining area creates a beautifully cohesive result.
Finish: matte for floors, always
Kitchen floors should always be matte or textured rather than polished or high-gloss. A polished floor will show every footprint, every splash of cooking oil, and every dried water mark. It will also be dangerously slippery when wet. A matte or silk finish hides daily wear, provides much better slip resistance, and looks considerably more sophisticated. Look for a PEI rating of 4 or above for kitchen floors to ensure adequate scratch and wear resistance.
The best kitchen floor tile options
| Style | Why it works in a kitchen | Best format | Cabinet colours it suits |
|---|---|---|---|
| Stone-effect porcelain | Warm and timeless. Works in both modern and classic kitchens. Mid-tones hide crumbs well | 600x600mm or 600x1200mm | White, cream, sage, warm grey, natural oak |
| Wood-effect porcelain planks | Brings warmth of timber with waterproof, scratch-resistant performance. Works across open-plan spaces | 200x1200mm plank | White, charcoal, navy, sage, natural wood tones |
| Concrete / micro-cement effect | Clean and contemporary. Very forgiving of daily mess in mid-tone versions | 600x600mm or larger | Handleless white, charcoal, black, deep blue |
| Terracotta-effect porcelain | Warm and characterful. Works brilliantly with shaker or country kitchens. Very on-trend | 300x300mm or 450x450mm | Cream, off-white, sage, olive, warm neutrals |
| Terrazzo-effect porcelain | Adds pattern without bold colour. Hides crumbs and splashes well. Feels playful yet refined | 600x600mm or larger | White, cream, soft sage, blush tones |
If your kitchen flows into a hallway or dining area, choose a floor tile that works across the whole run rather than changing material at each doorway. Continuity of flooring makes every space feel larger. Our team can help you identify tiles that work across multiple zones in a single visit.
Step 03
Choose your kitchen splashback tile
The splashback is the most visible surface in any kitchen and, unlike the floor, it does not need to withstand foot traffic. This gives you much more creative freedom. It is also the surface most likely to define the character of the whole room, so it deserves more thought than it often gets.
Think about the visual role first
A kitchen splashback can do one of two things: blend quietly into the background and let the cabinetry and worktop speak, or be the focal point of the whole kitchen. Neither is right or wrong, but you need to decide which role yours is playing before you choose the tile. A busy, colourful, or strongly patterned splashback needs calm, simple cabinetry and a neutral floor. A plain, minimal splashback can share the room with more interesting cabinetry and flooring.
Five splashback approaches worth considering
- Full-height slab splashback. A single large-format porcelain panel running from worktop to underside of wall units, with no or minimal grout lines. Very clean, very contemporary, and one of the strongest kitchen tile trends right now. Choose a marble-effect, stone-effect, or tonal concrete tile in 600x1200mm or larger.
- Tiles to ceiling. Rather than stopping at the base of the wall units, running tiles continuously up to the ceiling creates a dramatically cohesive result. This is the kitchen equivalent of tile drenching and works best with a large format tile in a single tone, minimal grout lines, and simple cabinetry.
- Glazed or handmade wall tile. Smaller-format glazed tiles, metro tiles in a soft colour, zellige, or handmade ceramics bring texture, warmth, and character that slab tiles cannot replicate. Popular colourways include sage green, warm terracotta, dusty teal, and muted blush.
- Pattern tile accent. A panel of encaustic, heritage, or patterned tiles used behind the hob or range cooker as a focal feature. Keep it contained to one defined area and keep everything else simple. Works beautifully in shaker and classic kitchens.
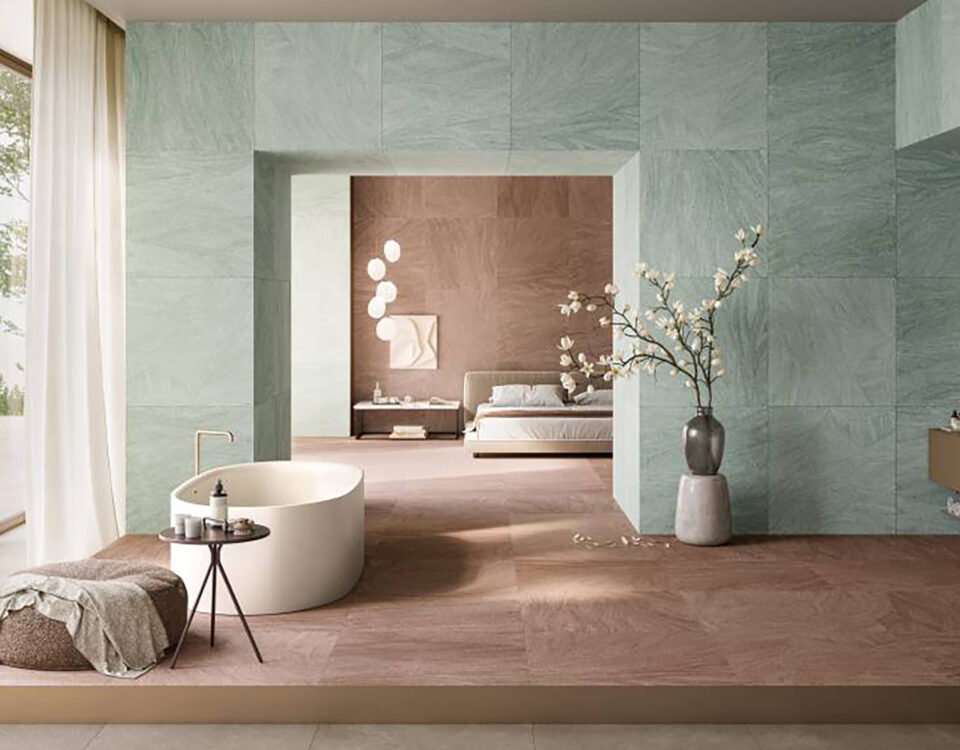
- Matching floor and splashback. Using the same tile (or tiles in the same material family) on both the floor and splashback creates a wonderfully coherent result. Use the same tone, not necessarily the same format: a large-format floor tile paired with a smaller wall tile in the same stone effect works very well.
The splashback is the one place in the kitchen where you can take a risk. It is a relatively small area, easy to regrout or retile in future, and has enormous impact on the overall feel of the room. Use it well.
Step 04
Get the floor and splashback working together
The most common kitchen tiling mistake is choosing a floor tile and a splashback tile completely independently, then finding they clash or simply do not relate to each other in the finished room. Here is how to get them working as a pair:
- Stay within one material family. If your floor is a warm stone-effect travertine, your splashback should reference the same warmth: a marble-effect tile in ivory and cream, a glazed tile in warm white or sage, or a matching stone-effect panel. Mixing a warm floor with a cool, grey-blue splashback will create an uncomfortable visual tension regardless of how good each tile looks on its own.
- Vary format and finish, not tone. The most coherent kitchen tile schemes use the same tone on floor and wall but change the format and finish: a large matte floor tile alongside a smaller glossy or glazed wall tile in the same colour family. This creates visual rhythm and contrast without a colour clash.
- Let one surface lead. Decide which surface is the statement, floor or splashback, and keep the other quieter. A bold, patterned encaustic floor needs a very simple, neutral splashback. A dramatic full-height marble-effect slab splashback works best with a calm, tonal floor tile that does not compete for attention.
- Factor in your worktop. The worktop sits between the floor and the splashback visually, and its colour and material will affect how both tiles read. A dark granite worktop separates the surfaces dramatically. A white or pale quartz worktop creates a lighter, more continuous feel. Take a worktop sample or photograph when you visit the showroom.
- Test samples in situ. Always order samples and live with them in your kitchen for a few days before committing to an order. Kitchen light changes significantly throughout the day: a tile that looks warm and inviting at midday may look flat or cold under artificial evening light.
We offer free samples of every tile in our range. Take two or three candidates home, prop them against your cabinets, and photograph them at different times of day before you decide. Our Exeter showroom also has full-size kitchen displays where you can see combinations working together in a real setting.
Step 05
Understand the practical requirements
Beyond aesthetics, kitchen tiles have specific practical requirements that are worth understanding before you order:
Slip resistance on floors
Kitchen floors get wet. Water, oil, and cooking liquids all end up on the floor regularly, and a slippery surface is a genuine safety risk. Look for a minimum R10 slip rating for kitchen floors. Matte and textured finishes achieve this naturally. Any tile described as “polished” or “lappato” (semi-polished) should be used on kitchen walls only, not floors.
Heat resistance around the hob
The area immediately behind and above a hob is exposed to radiant heat, steam, and grease splatter. Porcelain and ceramic tiles handle this without any concern: they are fired at very high temperatures during manufacture and are completely heat-stable. Natural stone tiles are also suitable. Avoid any adhesive-backed vinyl or non-ceramic alternatives in this area.
Grout choice matters more in kitchens
Standard cement-based grout in a kitchen will absorb grease and stain over time, particularly around the hob. For kitchen splashbacks, use an epoxy grout or a high-quality stain-resistant grout, especially in light colours. Alternatively, choose a grout in a darker tone that will not show grease discolouration over time.
Underfloor heating compatibility
Porcelain tiles are an excellent conductor of heat and work very well with both electric and water underfloor heating systems. If your renovation includes underfloor heating, tell your tile supplier, as some very thick large format tiles require specific adhesive and installation methods. Our team in the Exeter showroom can advise on the right products for your specific system.
Step 06
Avoid the most common kitchen tiling mistakes
These are the errors we see most often in kitchen tiling projects, and all of them are avoidable with a little forward planning:
- Choosing a high-gloss floor tile. It will show every mark, become slippery when wet, and look dated faster than a matte finish. Gloss belongs on walls and splashbacks, not floors.
- Using wall tiles on the floor. Wall tiles are not rated for floor use. They are thinner, softer, and not designed to bear the compression load of foot traffic. Always check the tile’s intended application before ordering.
- Underordering. Always add 10% to your measured area for cuts and breakage, and 15% for patterned tiles. Running out mid-project and reordering from a different batch is one of the most frustrating and costly problems in tiling.
- Choosing the splashback without considering the cabinet colour. Always finalise your cabinet colour before choosing the splashback tile. The cabinet is the dominant visual element in any kitchen, and your tile needs to complement it specifically, not just look good on its own.
- Standard cement grout on a light splashback. It will yellow and grease-stain around the hob within a year. Use an epoxy or stain-resistant grout on kitchen splashbacks, particularly in light colours near cooking zones.
The kitchen is not the place to cut corners on tile quality. A good kitchen floor tile will still look excellent after fifteen years of daily use. A poor one will look tired within three. The difference in cost is smaller than most people expect, and the difference in long-term satisfaction is significant.
Plan your kitchen tiles with our Exeter team
Visit Devon’s largest tile showroom to see our full kitchen tile range in real displays. Bring your cabinet door, worktop sample, and room dimensions and our team will help you build a scheme that works beautifully and lasts. Free samples available. Guaranteed Best Prices.
lafabrico.com | 01392 848487 | Marsh Barton, Exeter EX2 8QX
