Of all the decisions in a tiling project, grout is the one most people make last and think about least. It is the last thing that goes in, it takes up the smallest physical space, and it is easy to treat as an afterthought once you have spent the time choosing your tiles. This is a mistake. Grout colour alone can transform a beautifully chosen tile into a room that looks exactly right — or undermine one completely. And the type of grout you choose has a significant practical impact on how easy your tiled surface is to keep clean and how long it lasts.
This guide covers everything: grout types, grout colour choices, the matching versus contrasting debate, specific combinations for different tile colours, what to use in showers and wet rooms, and the questions we get asked most often at La Fabrico. Get grout right and no one will ever notice it. Get it wrong and it is the only thing they will see.
Step 01
Understand the two types of grout
Before thinking about colour, you need to choose the right grout type for your application. There are two main categories, and using the wrong one is one of the most common and most avoidable tiling mistakes:
| Grout type | What it is | Best for | Watch out for |
|---|---|---|---|
| Cementitious grout | Cement-based powder mixed with water. The most common type. Available in a wide range of colours | Walls, floors, most standard indoor tiling applications | Porous — absorbs stains and moisture if not sealed in wet areas. Can discolour near hobs. Use a penetrating sealer once cured |
| Epoxy grout | Two-part resin system (resin and hardener). Non-porous, extremely durable, and fully waterproof once cured | Showers, wet rooms, pool surrounds, kitchen splashbacks near hobs, any area with sustained moisture or grease | More expensive than cement grout. Harder to apply — it sets quickly and requires confident, experienced installation. Difficult to remove if it cures on the tile face |
For most dry wall applications — a bathroom feature wall, a hallway floor, a living room — good quality cementitious grout sealed after installation is entirely appropriate. For any area with sustained water exposure — a shower enclosure, a wet room, the area immediately behind a kitchen hob — epoxy grout is the correct choice and will repay the additional cost many times over in reduced maintenance and longevity.
When you visit our Exeter showroom to choose tiles, always tell our team which room and application you are tiling. We will recommend the right grout type at the same time as helping you choose the tile — it avoids a second decision and ensures the two products are compatible.
Step 02
Understand joint width: the practical decision before colour
The width of your grout joint affects both the look of the finished surface and which grout products are appropriate. UK standards (BS 5385) set the minimums, but the right joint width depends on your tile type and the look you are trying to achieve:
- Rectified tiles (precision-cut to exact dimensions) can use joints as narrow as 1.5 to 2mm. This is the approach used in tile drenching and large format installations where near-seamless surfaces are the goal. Minimal joints read as more expensive and create a calmer visual field.
- Standard porcelain and ceramic tiles typically use 2 to 3mm joints on walls and 3mm on floors. This is the most common approach for most bathroom and kitchen applications.
- Natural stone tiles typically need 3 to 5mm joints to allow for natural size variation between pieces.
- Zellige, handmade, and non-rectified tiles often need wider joints of 4 to 6mm because the tiles themselves vary in size and edge. The wider joint is part of the aesthetic — it emphasises the handmade, artisanal character.
- Outdoor tiles require a minimum 3mm joint to allow for thermal expansion. Never use narrow joints on exterior applications.
The narrower the joint, the more seamless the surface reads. For large format tiles and tile drenching, a 1.5 to 2mm joint with a closely matched grout colour is one of the most effective ways to achieve a genuinely high-end result.
Step 03
Choose your approach: matching, tonal, or contrasting
This is where most people spend their thinking time — and with good reason. The relationship between tile colour and grout colour is one of the strongest visual levers in a tiled room. There are three broad approaches:
Matching grout
Choosing a grout as close as possible to the tile colour makes the joint lines almost disappear. The eye reads the surface as one continuous material rather than a grid of individual tiles. This is the right approach for large format tiles, tile drenching, stone-effect and marble-effect porcelain, and any application where you want the tile itself to be the focus rather than the pattern of joints. It is also more forgiving of slight colour variation between grout batches.
Tonal grout (one shade different)
Choosing a grout one shade darker than the tile creates subtle joint definition without the contrast of a fully contrasting choice. This is the most versatile approach and works well across almost every tile and application. It is particularly effective with natural stone-effect and wood-effect tiles where a slight joint definition reinforces the material reference without fighting it. When in doubt, go one shade darker than the tile.
Contrasting grout
A strongly contrasting grout — dark grout with light tiles, or white grout with dark tiles — emphasises every joint and turns the grout pattern itself into a design element. This is a bold, deliberate choice that works very well with smaller format tiles (metro tiles, mosaics, encaustic tiles, zellige) where the pattern of joints is part of the aesthetic. Used with large format tiles it creates a visible grid that tends to read as busy and can make a room feel smaller. Always see a sample of both tile and grout together before committing to a contrasting combination.
Using bright white grout with coloured or stone-effect tiles because it was the default option or the cheapest choice. White grout on non-white tiles creates a strong grid that fights the tile design rather than supporting it, and white grout in kitchens and showers will yellow and stain within months without meticulous maintenance. Choose your grout colour deliberately.
Step 04
Grout colour by tile colour: specific combinations
Here is a practical guide to the grout colours that work best with the most common tile colours in UK homes:
White tiles
The most popular choice. White grout looks clean but stains quickly and makes the grid very visible. A soft grey or warm off-white grout is more practical and better looking.
Best grout: Light grey, warm white, or pale stoneGrey tiles
Match the grout to the grey tone of the tile as closely as possible. A cooler grey tile needs a cool grey grout; a warm greige tile needs a warmer mid-grey or greige grout. Mismatching warm and cool tones creates an unsettled result.
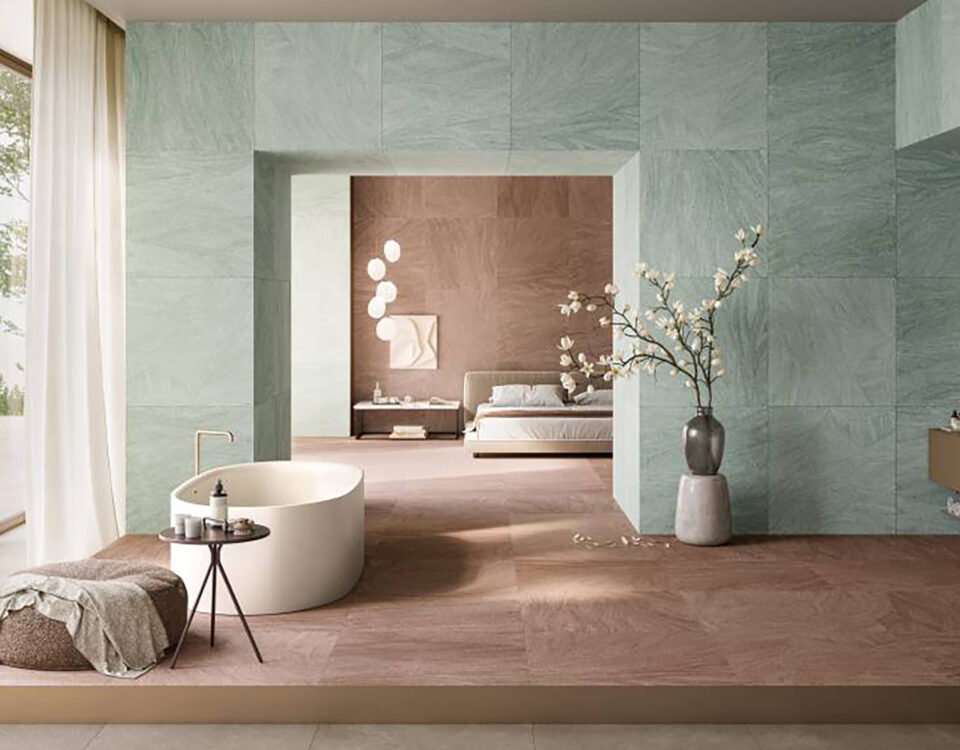
Best grout: Matched grey, one shade darker than the tileStone-effect and travertine tiles
These tiles are designed to read as natural material. Matching or near-matching grout in a warm sand or mid-beige tone reinforces the natural stone look. White grout fights it. Contrasting dark grout makes it look tiled rather than stone.
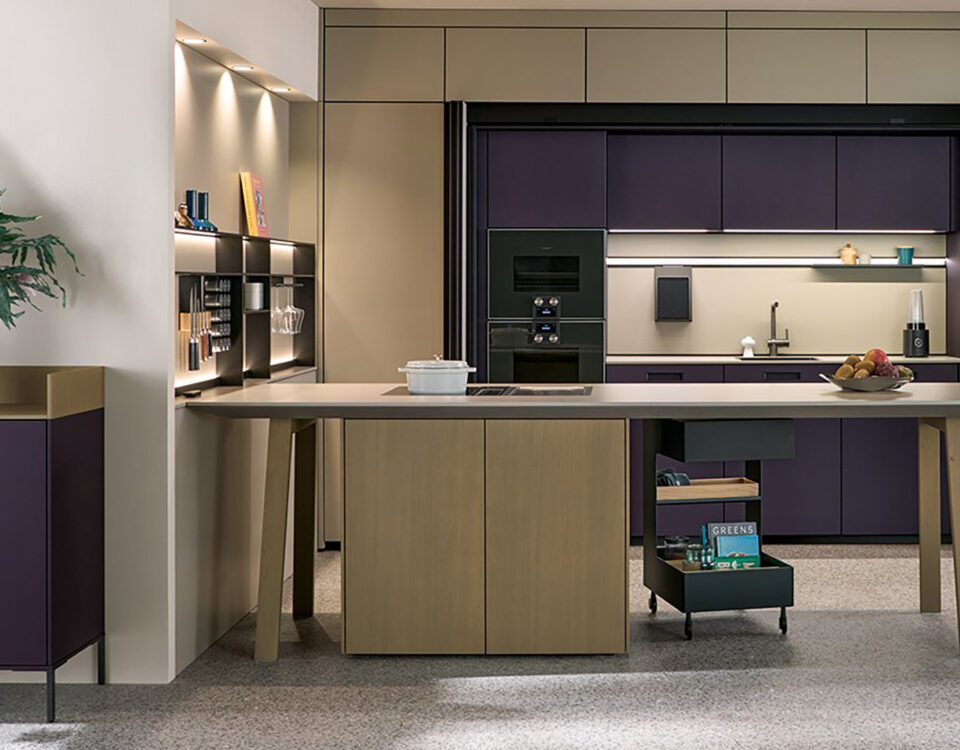
Best grout: Warm sand, ivory, or stone-matched beigeDark and charcoal tiles
Matching dark grout with dark tiles creates a sleek, monolithic result that is extremely sophisticated. Lighter or contrasting grout creates a strong grid — intentionally bold, but only use it if that is the deliberate aesthetic.
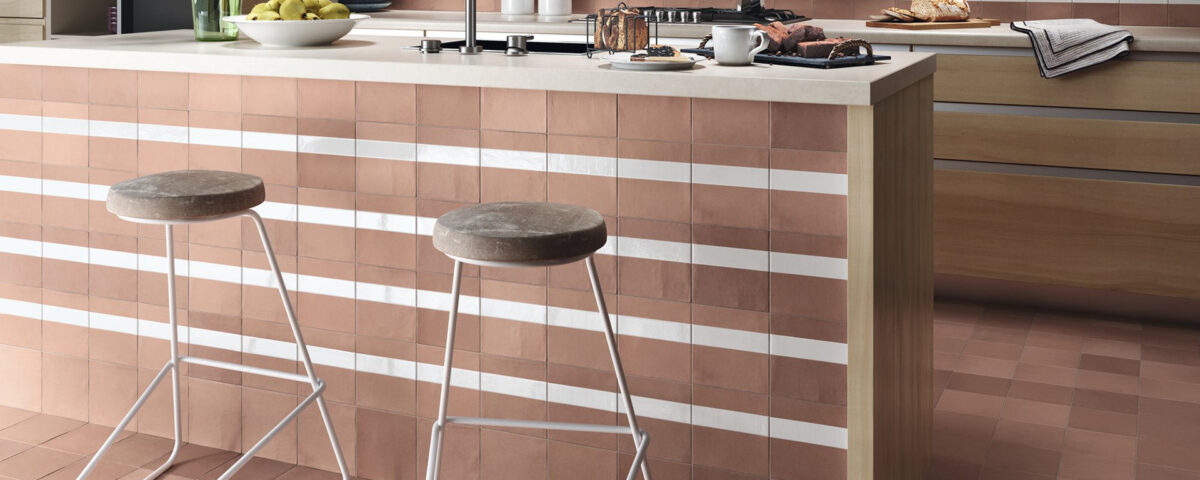
Best grout: Matching charcoal or dark greyTerracotta and warm-toned tiles
A warm mid-tone grout in a complementary earthy tone looks considered and natural. Avoid cold or grey grout alongside warm terracotta — the tonal clash is immediately apparent.
Best grout: Warm buff, mid-brown, or earthy beigeZellige and handmade tiles
Zellige and handmade tiles are designed to show individual variation. A contrasting grout can work here specifically because it emphasises each tile’s uniqueness. Matching grout is also beautiful — it makes the shimmer and variation in the glaze the primary focus.
Best grout: Matching tone, or a deliberate contrast for emphasisMarble-effect tiles
Marble-effect porcelain is most convincing when the grout almost disappears. A warm white or ivory grout closely matched to the background tone of the tile is ideal. Avoid grey grout with warm-white marble effects — the colour mismatch reads as a mistake.
Best grout: Warm white, ivory, or light stoneMetro and brick tiles
Metro tiles are one of the few applications where contrasting grout genuinely improves the result — it references the original subway tile aesthetic. Dark grey or charcoal grout with white or off-white metro tiles is a classic combination. Sage green metro tiles look equally strong with a warm mid-grey or a contrasting off-white grout.
Best grout: Dark grey or charcoal for contrast; mid-grey for a subtler resultStep 05
Grout for specific rooms and applications
The room you are tiling determines the grout product you should use, not just the colour. Here is the right approach for each area:
-
Shower enclosures and wet rooms. Use epoxy grout throughout, including on the walls. The sustained daily exposure to water, steam, cleaning products, and body oils in a shower will cause cementitious grout to discolour, deteriorate, and eventually allow water penetration regardless of how well it was initially sealed. Epoxy grout is the correct specification here, full stop. Choose a colour matched closely to the tile and the visual difference from cementitious grout is undetectable.
-
Kitchen splashbacks near the hob. Epoxy grout again. The combination of grease, heat, and regular contact with cooking products means cementitious grout will stain and yellow regardless of colour choice. A stain-resistant epoxy grout in a tone matched to the tile makes the splashback easy to wipe clean and prevents the grout lines becoming the most prominent feature of your kitchen within two years.
-
Bathroom floors. Use a flexible cementitious grout rated for floor applications, sealed after installation. Choose a colour in the mid-tone range — pale grey, mid-beige, or sand — that will hide the inevitable accumulation of foot traffic marks between cleaning. Very light grout on bathroom floors requires constant maintenance to look clean.
-
Bathroom walls (non-shower areas). Good quality cementitious grout, sealed after installation, is appropriate for bathroom walls outside the shower enclosure. The visual priority here is choosing a colour that complements the tile. Seal immediately after the grout cures and re-seal annually in humid bathrooms.
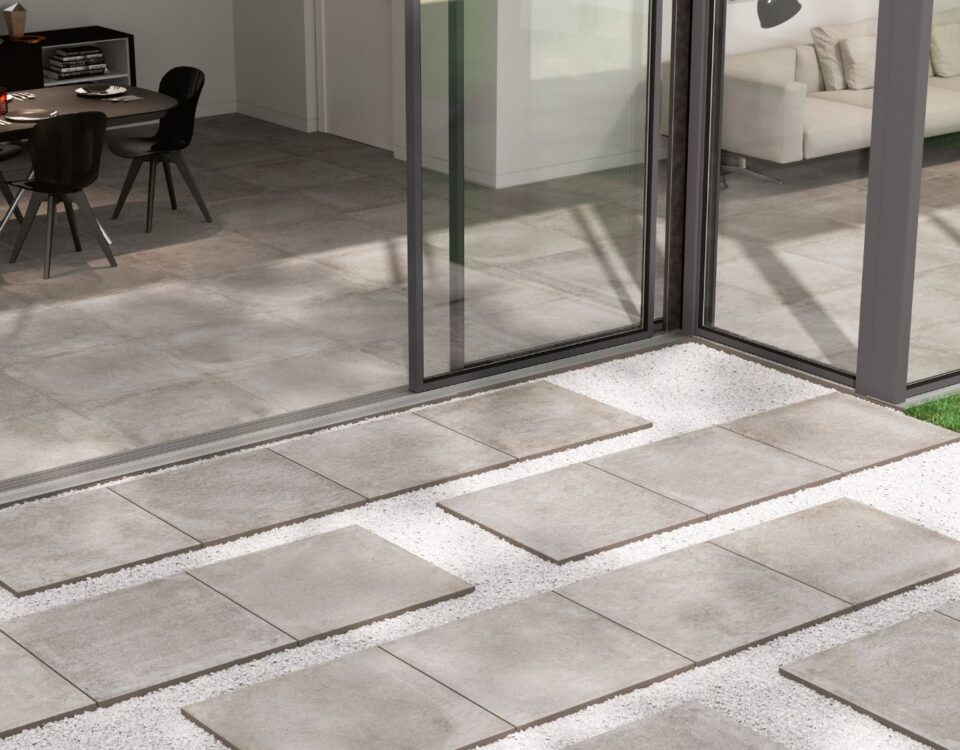
-
Outdoor tiles. Use a flexible, frost-proof pointing compound specifically rated for external use — not standard indoor cementitious grout. Outdoor surfaces contract and expand seasonally with temperature change, and rigid indoor grout will crack at the joints within the first winter. Use a minimum 3mm joint and a colour matched to the tile for the most seamless outdoor result.
-
Natural stone tiles. Use an unsanded or fine-sanded grout specifically designed for natural stone. Standard grout can contain aggregates that scratch polished stone surfaces. Always seal the stone before grouting to prevent the grout pigment from staining the tile face, particularly on porous stones such as limestone and travertine.
All cementitious grout in wet or kitchen areas should be sealed with a penetrating grout sealer once it has fully cured (typically 28 days for full cure, though the surface can be cleaned gently after 24 hours). Reseal annually in showers and around hobs. This single step extends the life and appearance of your grouted surface significantly. Epoxy grout does not need sealing.
Step 06
How to make your final grout colour decision
Grout colours vary between brands, between product ranges, and even between production batches of the same product. Here is how to make a reliable final decision:
- Always test with physical samples. Grout colours look different on a computer screen, in a showroom, and in your actual bathroom. Get a small sample sachet of your shortlisted grout, mix it up, apply it to a spare tile, and let it dry fully before judging the colour. Wet grout is always darker than dry grout.
- Dry grout is lighter than wet grout. The colour you see when you apply grout is not the finished colour. Grout lightens significantly as it dries and cures. Always judge the colour from a fully dried sample, not from the freshly applied joint.
- Test in the actual room’s light. A warm grout that looks perfect in our showroom may read differently under your bathroom’s artificial lighting. Take the tile and grout samples home and view them together under the lighting conditions they will actually live in.
- Order slightly more grout than you need. Grout, like tiles, can vary between production batches. If you run short and order more, the new batch may be a slightly different shade. Calculate your required quantity carefully and add 10% as a buffer.
- Our team will help you match. When you visit our Exeter showroom, bring your tile samples (or order them from us first). We can show you grout colours against your chosen tile in good daylight and help you make a confident final decision.
Common Questions
Grout questions we get asked most often
These are the questions our team hears most frequently at the La Fabrico showroom — and the honest answers to each:
Should grout match the tile?
In most cases, yes — or at least sit very close in tone. Matching or near-matching grout makes a tiled surface feel calmer, more spacious, and more considered. A grout that is one shade darker than the tile is the safest and most versatile choice for almost any application. Contrasting grout should only be used deliberately, when the pattern of joints is intentionally part of the design — with metro tiles, mosaics, or small-format encaustic tiles, for example.
What colour grout should I use with grey tiles?
Match the grout to the specific tone of your grey tile as closely as possible. Cool grey tiles need a cool grey grout; warm grey or greige tiles need a warmer mid-grey. Using a cold grey grout with a warm-toned tile, or vice versa, creates a tonal clash that is immediately noticeable. Go one shade darker than the tile for a safe result that adds subtle joint definition without strong contrast.
What colour grout should I use with white tiles?
Avoid bright white grout on white tiles in wet or kitchen areas — it stains and yellows quickly and makes the grid pattern very visible. A soft grey, warm off-white, or pale stone grout is a better choice: it looks cleaner in practice, hides marks better, and creates less visual noise. If you want a strong contrasting grid pattern with white tiles, a dark grey or charcoal grout is a bolder but intentional choice.
What is the best grout for a shower?
Epoxy grout is the best choice for a shower. It is non-porous, fully waterproof, stain-resistant, and does not need sealing. Standard cementitious grout in a shower will absorb water and soap residue, discolour over time, and eventually allow moisture to penetrate behind the tiles regardless of sealing. Epoxy grout costs more and is harder to apply, but in a shower it is the correct specification.
What is the difference between grout and sealant?
Grout fills the joints between tiles and is a rigid or semi-rigid material once cured. Sealant (silicone) is a flexible waterproof compound used at movement joints — typically at the perimeter of a tiled area where tiles meet a wall, floor, bath, or shower tray, and at internal corners. Never use grout at these junctions: rigid grout at a movement joint will crack as the building moves seasonally. Always use silicone sealant at baths, shower trays, and floor-to-wall junctions, in a colour matched to your grout.
How do I stop grout going dark in the shower?
The best solution is to use epoxy grout from the start, which will not absorb moisture or stain. If you have cementitious grout, apply a penetrating grout sealer after the grout has fully cured and re-seal annually. Ensure the shower is adequately ventilated to reduce residual moisture. Dark grout in a shower is often caused by mildew rather than dirt — a mould-resistant grout and good ventilation address this at the source.
Can I change grout colour without retiling?
Yes. You can regrout by raking out the existing grout to a depth of around 5 to 6mm and applying fresh grout in the new colour. This is moderately time-consuming but does not require removing the tiles. Alternatively, grout paint or grout colourant can be applied directly over existing grout — this is quicker but less durable and works best on lighter-to-darker colour changes rather than the reverse.
How wide should grout joints be?
As a general rule: 1.5 to 2mm for rectified large format tiles where a near-seamless look is the goal; 2 to 3mm for standard wall tiles; 3mm for floor tiles; 3 to 5mm for natural stone; 4 to 6mm for zellige and handmade tiles; and a minimum 3mm for all outdoor applications to allow for thermal movement. Narrow joints require precisely laid tiles and a skilled installer — never specify minimal joints without discussing the substrate and tile type with your tiler first.
Get your grout right at our Exeter showroom
When you visit La Fabrico to choose your tiles, we will help you choose the right grout type, colour, and finish for your specific application at the same time. No second guessing, no separate trip to the builders’ merchant. Free samples available. Our team has matched grout to tiles thousands of times and we will steer you away from the combinations that do not work. Guaranteed Best Prices on tiles and grout.
lafabrico.com | 01392 848487 | Marsh Barton, Exeter EX2 8QX
